

How to create a custom View in Outlook
Microsoft Outlook provides various layouts of your inbox that requite your inbox a different look, such as Compact, Single and Preview. Y'all can also change the view in other interfaces in Outlook, such as Agenda, Contacts, and Task, merely what if y'all want to create your custom view. The custom view is created using the Change View feature available in Outlook.
What is the Modify View feature in Outlook?
The Alter View feature allows Outlook users to alter the electric current view to another view. Y'all can cull a view offered in the context menu or create a custom view. Give your inbox a dissimilar look, such equally Meaty, Unmarried and Preview.
How to create a Custom View in Outlook
To create a custom view in Outlook, follow the steps beneath.
- Launch Outlook
- Click the View tab
- Click Change View in the Current View group
- Then select Manage Views
- Click the New push button in the Manage All Views dialog box
- Input the name of the new view in the entry box in the Create a New View dialog box
- And then select the type of view you want in the Type of View list box
- In the 'Can be used on' section select a category
- Then click OK
- Select and configure any of the settings displayed in the Advanced View Settings: New view dialog box
- then click OK
- Click OK on the Manage All Views dialog box
- We have created a custom view.
Launch Outlook.

Click the View tab on the card bar.
Click Change View in the Current View group and select Manage Views.
In the drop-downwards menu, click Manage Views.
The Manage View options create, modify and apply views to the folder.
A Manage All Views dialog box will open.
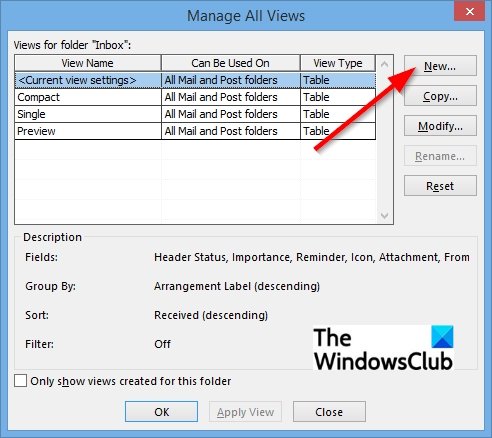
In the dialog box, click the New button.
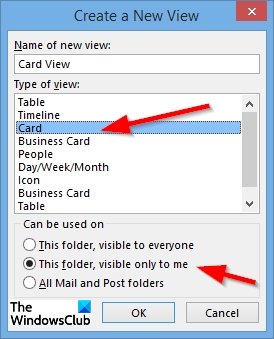
A Create a New View dialog box volition appear.
Inside the dialog box, input the proper noun of the new view in the entry box.
So select the type of view you want in the Blazon of View list box.
In this tutorial, we choose the Card view.
In the 'Can be used on' section select a category. In this tutorial, we choose This folder, only visible to me.
And so click OK.
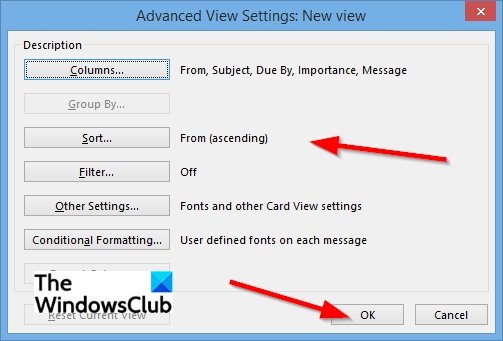
The Advanced View Settings: New view dialog box will appear.
Select and configure whatever of the settings displayed and then click OK.
Click OK for the Manage All Views dialog box afterwards closing the Advanced Settings dialog box
Nosotros have created a custom view.
How do I customize my electronic mail view in Outlook?
To customize the email view, y'all need to click the View tab display on the ribbon, to modify the view of the inbox and cull one of the views from the menu listed: Meaty, Single or Preview.
How do you customize the pane in Outlook?
In Microsoft Outlook, the user can customize the pane by clicking the View tab, selecting the Reading Pane button in the Layout group, and selecting whatsoever options from the carte du jour such as right, bottom, or off; this will shift the pane in the position you accept selected.
Nosotros hope this tutorial helps yous understand how to create a custom View in Outlook.


Source: https://www.thewindowsclub.com/how-to-create-a-custom-view-in-outlook
Posted by: kellingebothe.blogspot.com
0 Response to "How to create a custom View in Outlook"
Post a Comment